
How to Create and Complete a CAQH Account
By George Ruan • July 14, 2026
Last updated: July 14, 2026.
This guide answers one narrow question: how does a provider create and complete a CAQH Provider Data Portal account?
The workflow is straightforward, but the details matter. You register, create login credentials, complete your profile, review and correct errors, authorize participating organizations, attest, and upload supporting documents.
Google question answered: How do providers create and complete a CAQH account? Start at the Provider Data Portal, register or use your welcome email, create your account, fill every required profile section, authorize plans, attest, and upload approved documents.
Sections
- Before You Start
- Step 1: Register or Use the Welcome Email
- Step 2: Create the CAQH Account
- Step 3: Complete Profile Data
- Step 4: Review Errors and Attestation Status
- Step 5: Authorize Plans and Organizations
- Step 6: Complete the Documents Tab and AAR Form
- Step 7: Keep the Account Maintained
- The Fast Checklist
- Sources
Before You Start
Gather the information first. CAQH says the initial profile can take up to two hours, and preparation reduces the time required.
individual NPI and taxonomy,
Social Security number and other requested identifiers,
professional license number and expiration date,
education, internship, residency, and work history where applicable,
malpractice insurance face sheet,
practice locations and contact details,
billing contact and credentialing contact information,
DEA or controlled-substance documents if applicable, and
the list of plans or organizations that need access.
If you are not sure why this profile matters, read What Is CAQH and Why Do Providers Need It? first.
Step 1: Register or Use the Welcome Email
Go to the CAQH Provider Data Portal. If you received a welcome email from CAQH Provider Data Portal, use the link in that email. If you did not receive a welcome email, the Provider User Guide says you can begin self-registration from the portal by clicking Register.
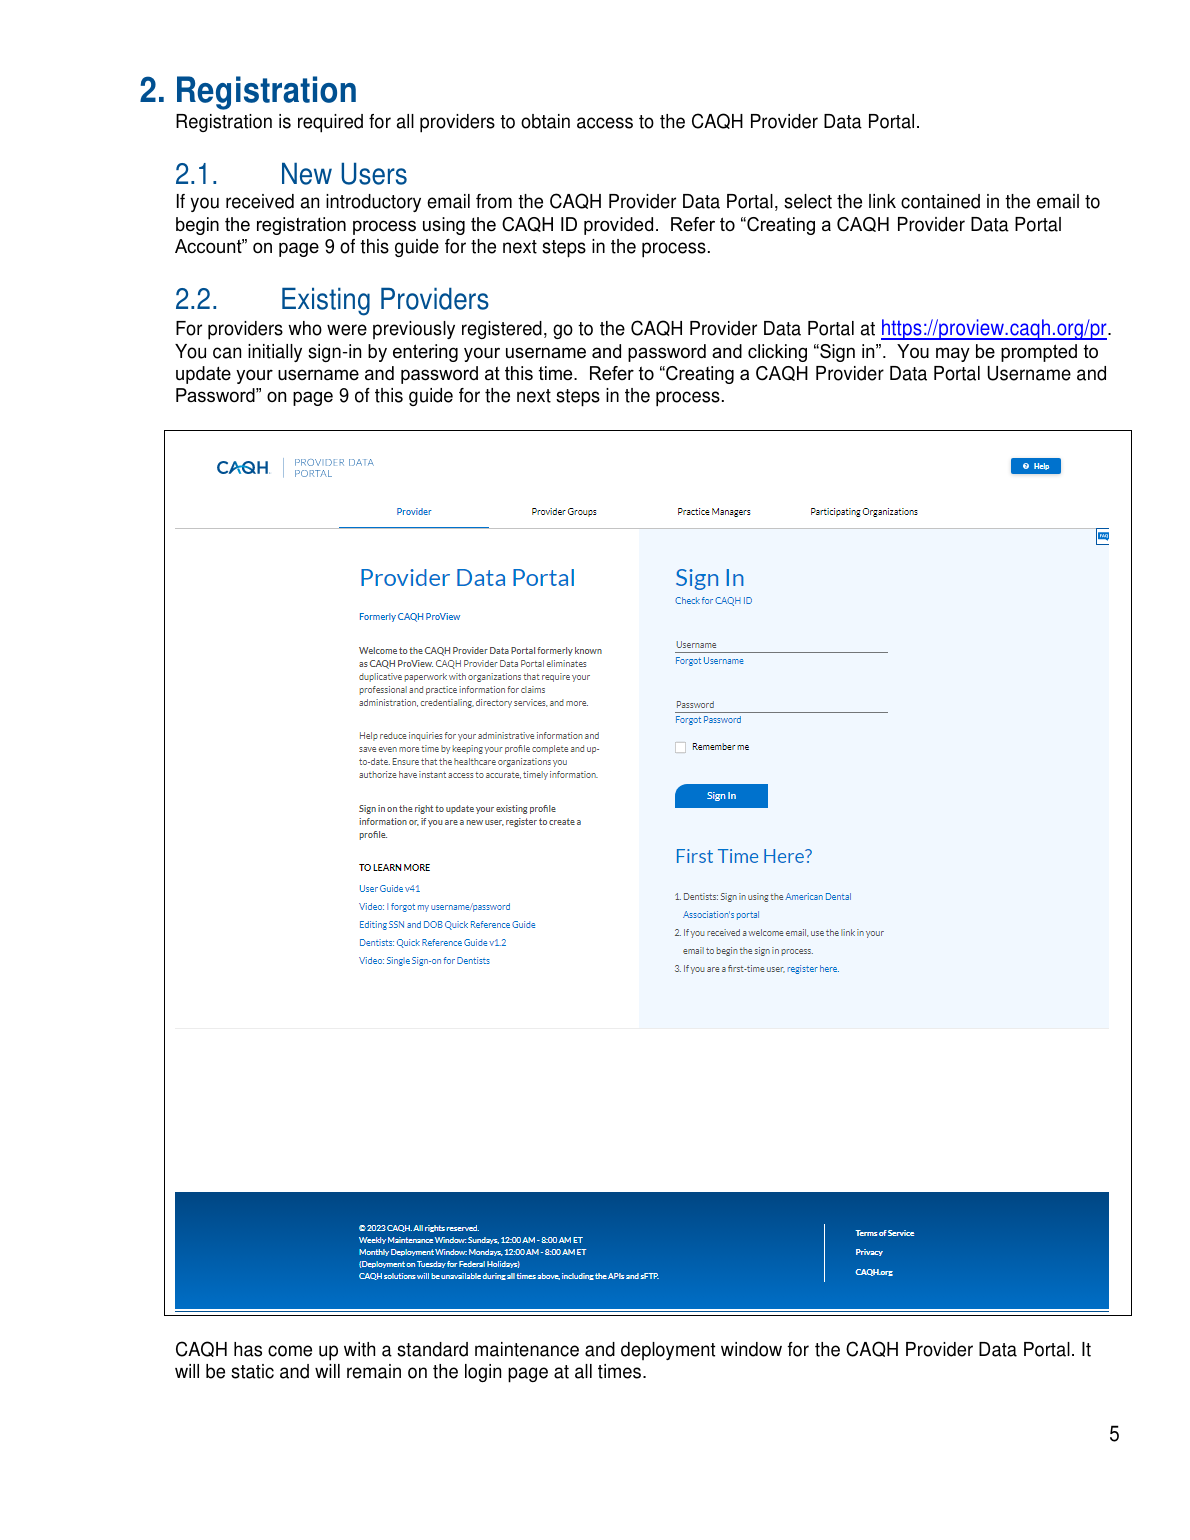
Screenshot source: CAQH Provider Data Portal Provider User Guide.
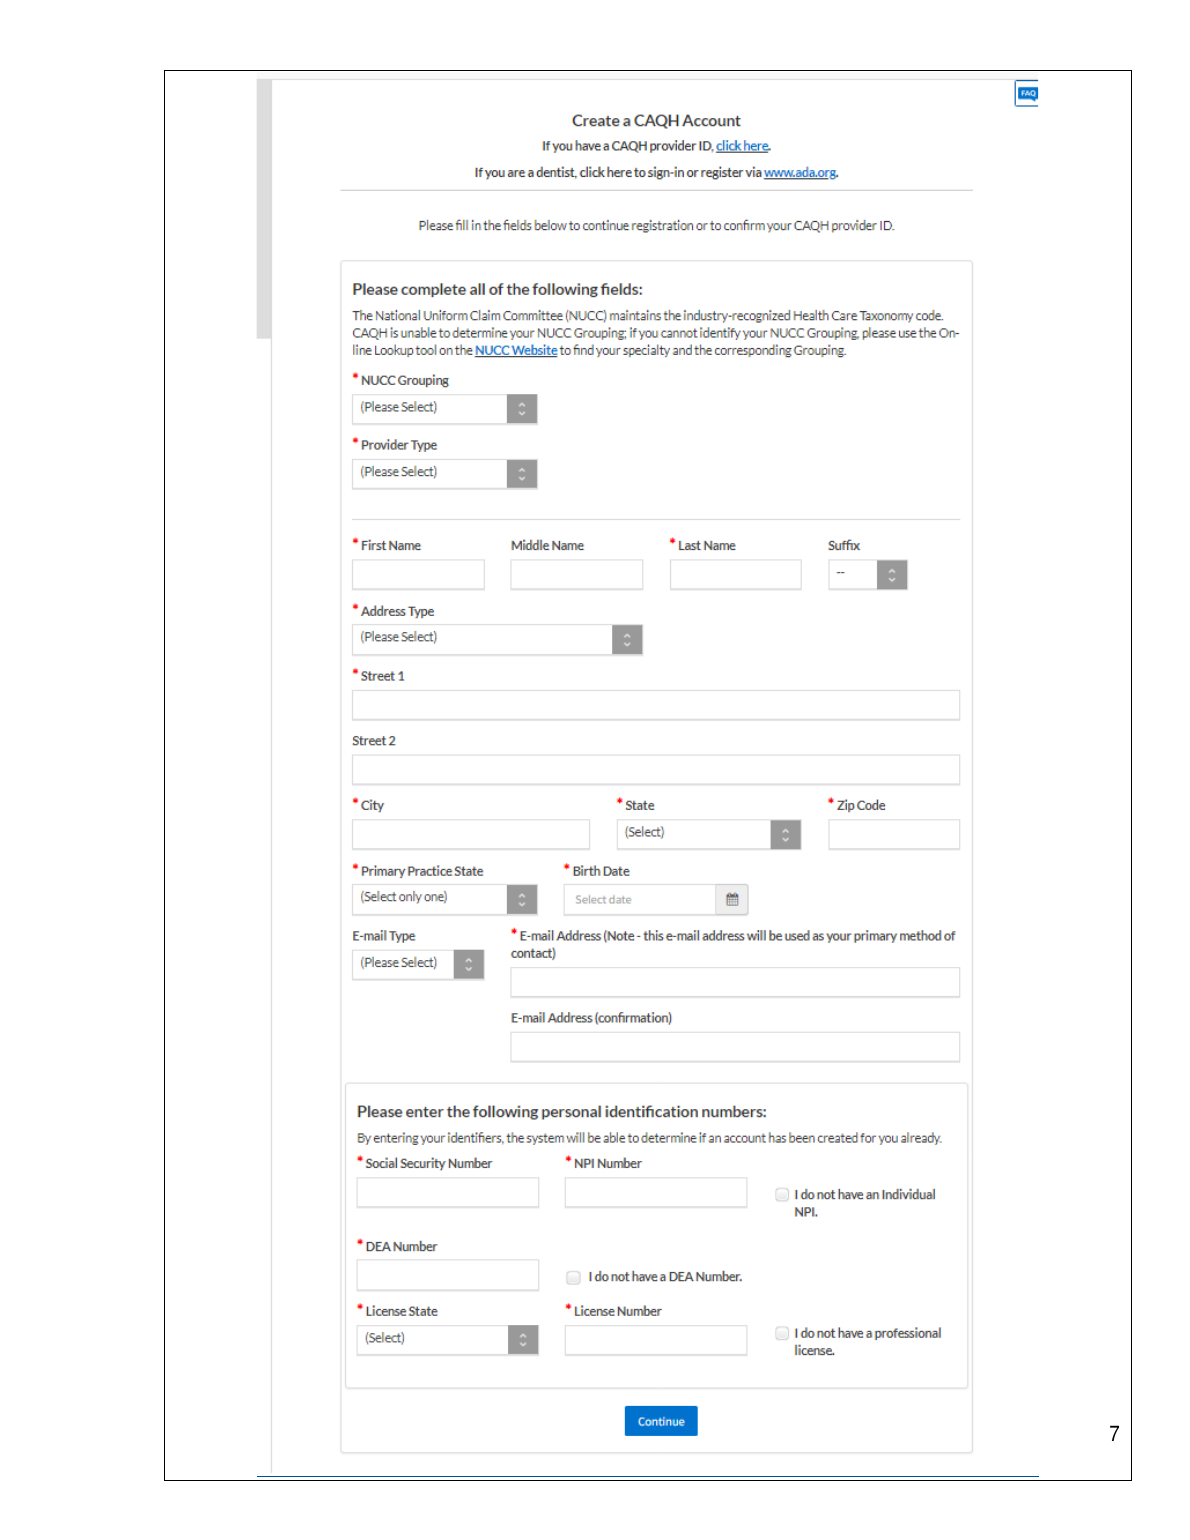
For self-registration, CAQH asks for provider type, name, address, primary practice state, birthdate, email, and personal identification numbers such as SSN, NPI, DEA, license state, and license number when applicable.
Step 2: Create the CAQH Account
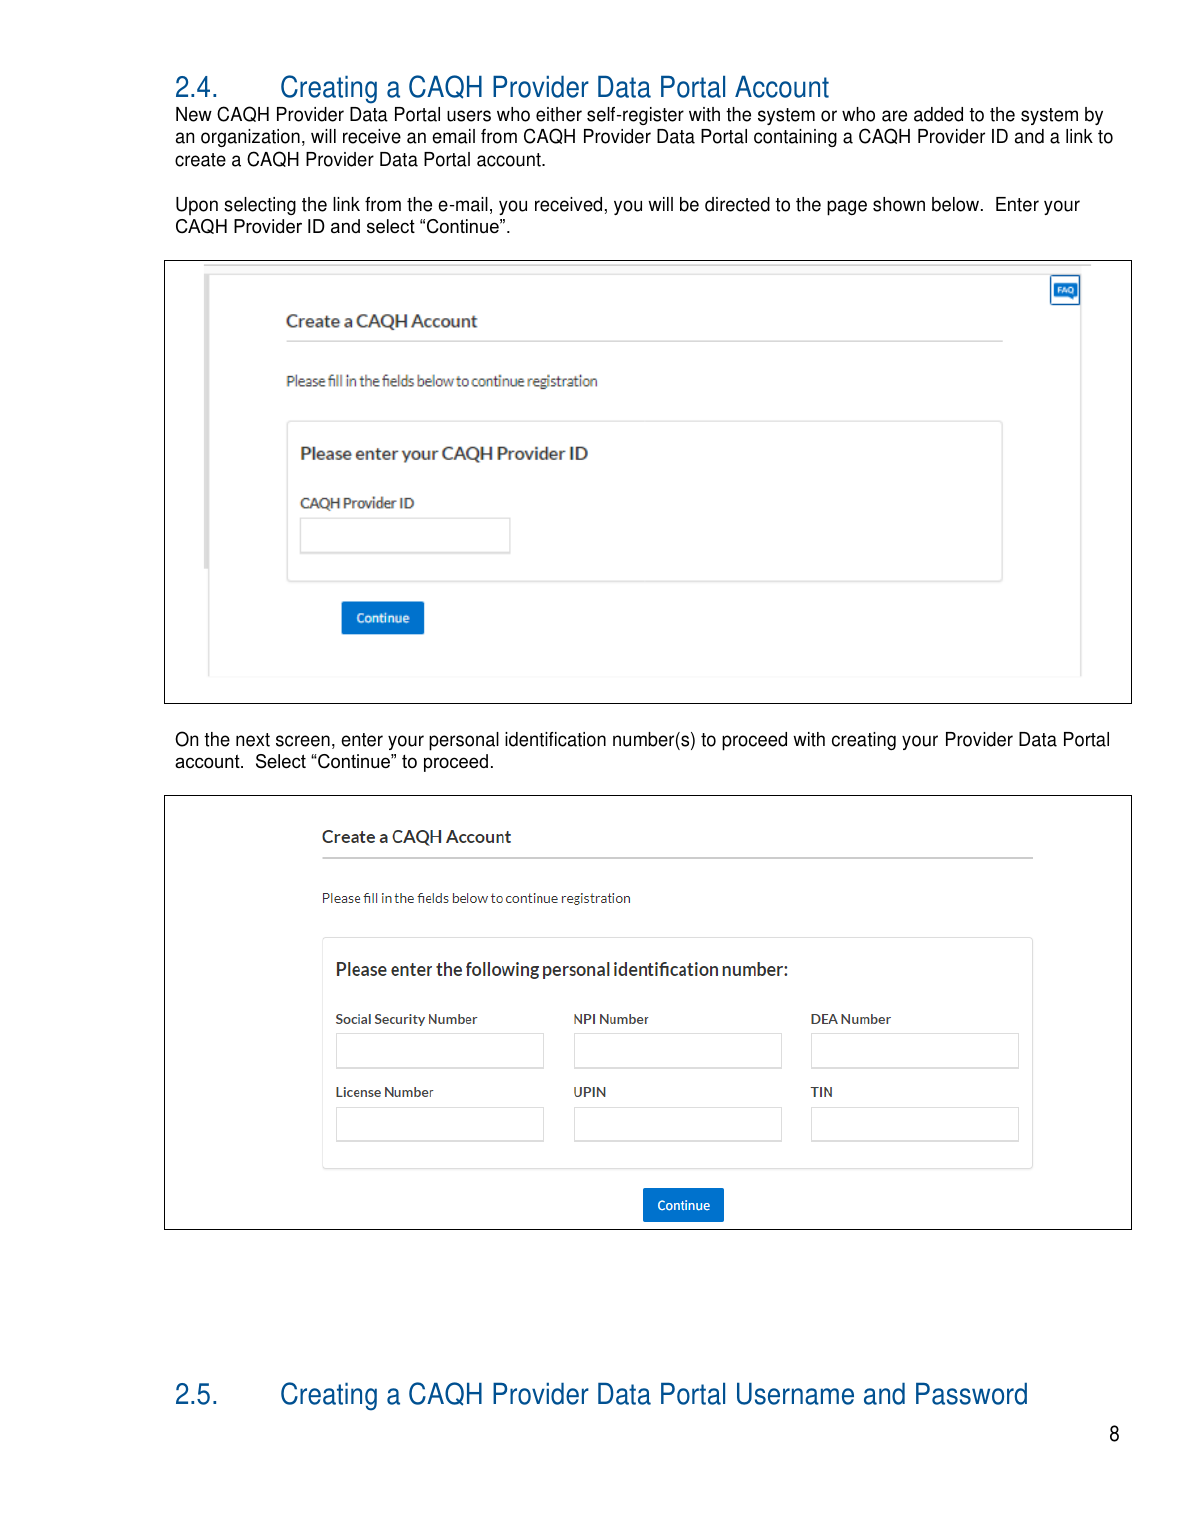
After self-registration or payer invitation, CAQH sends a CAQH Provider ID and an account creation link. The guide shows the provider entering the CAQH Provider ID first, then confirming identity with requested identifiers.
Screenshot source: CAQH Provider Data Portal Provider User Guide.
Use an email address you control long term. Credentialing stalls when the CAQH email goes to a former employer, old biller, or staff member who left the practice.
Screenshot source: CAQH Provider Data Portal Provider User Guide.
Step 3: Complete Profile Data
Once you can log in, open Profile Data and complete every required section. Do not stop when the easy demographic fields are done. Plans usually need the whole profile to be complete, internally consistent, authorized, and attested.
Expect to work through sections like:
Personal and professional IDs: name, NPI, taxonomy, license, DEA if applicable, and other identifiers.
Education and training: schools, graduate programs, internships, residencies, and certifications when applicable.
Practice locations: service addresses, phone/fax, telehealth, office hours, accepting-new-patients status, and location-level details.
Credentialing history: work history, gaps, disciplinary questions, sanctions, malpractice history, and disclosure questions.
Contacts: credentialing contact, practice contact, and billing contact information.
Step 4: Review Errors and Attestation Status
CAQH routes the provider through review screens before the profile is complete. The Provider User Guide describes a Correct Errors screen that highlights required and suggested fixes. Fix required errors and seriously review suggested fixes before you treat the profile as ready.
Screenshot source: CAQH Provider Data Portal Provider User Guide.
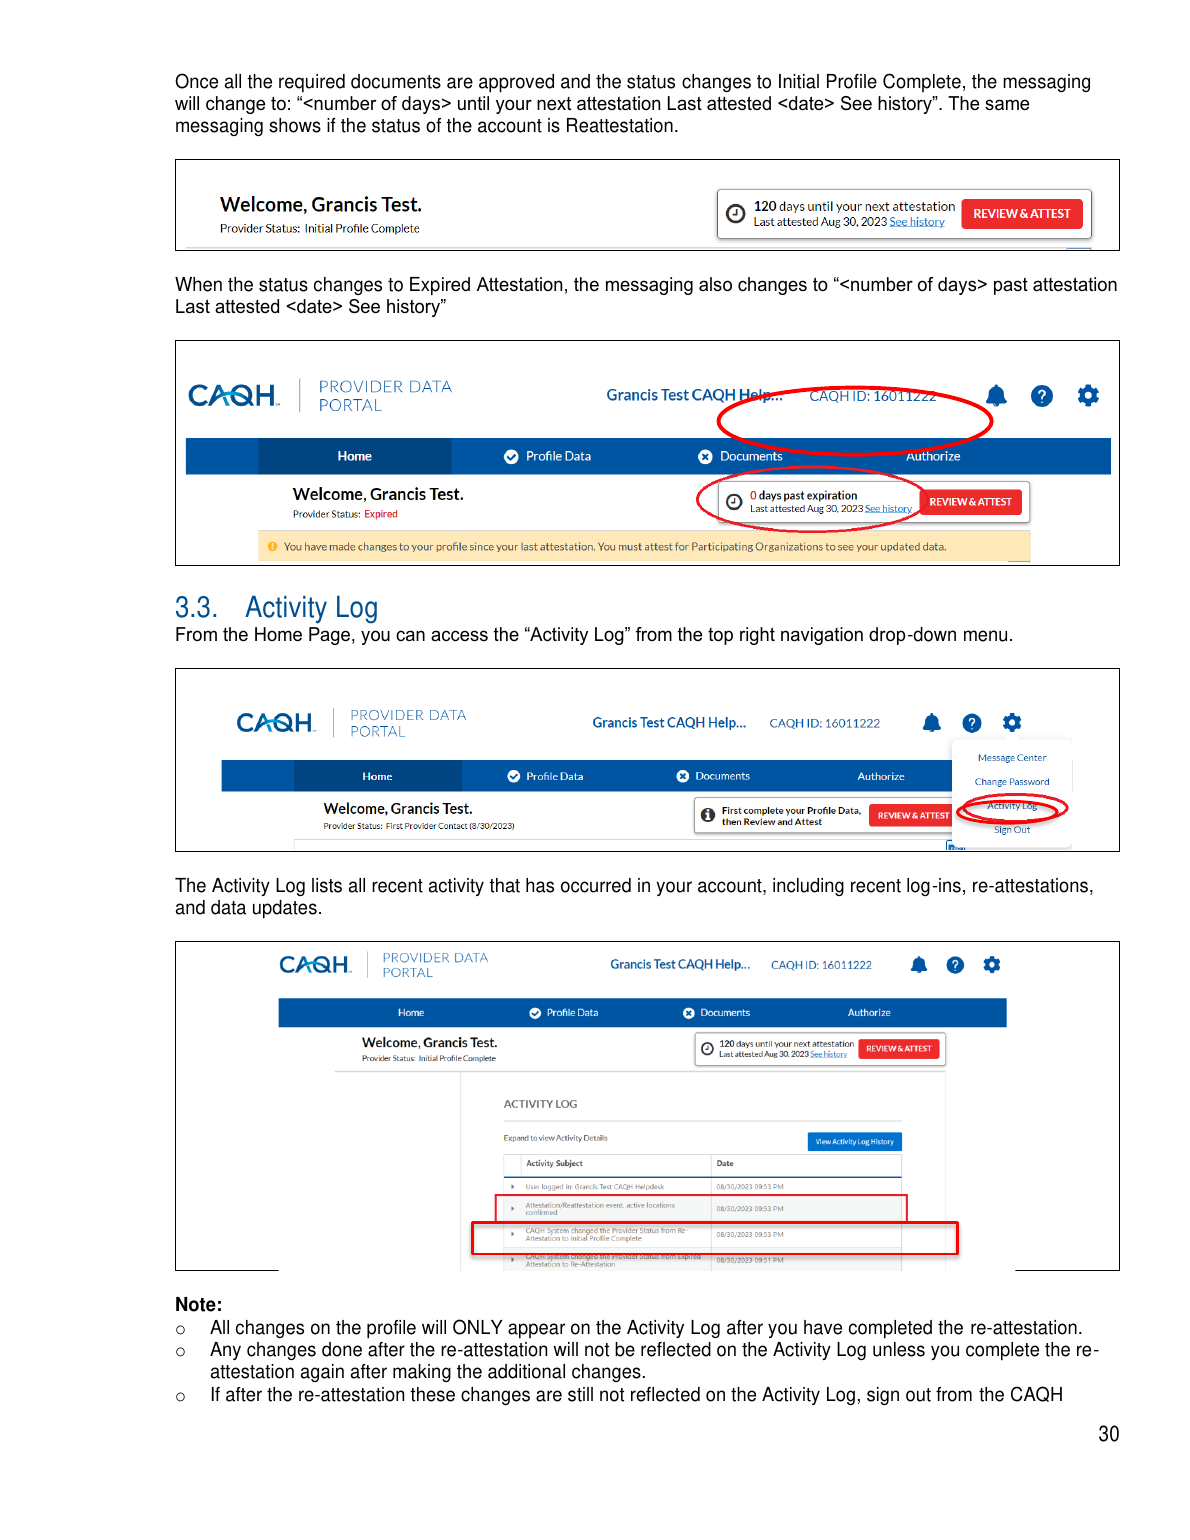
Attestation is the provider saying the profile data is accurate and complete. For a first-time profile, though, clicking Review & Attest is not always the final blocker. CAQH can move you next to Documents and ask you to submit required forms before the profile becomes Initial Profile Complete.
Step 5: Authorize Plans and Organizations
A complete CAQH profile does not automatically help a payer that has no access. Use the Authorize area to give participating organizations access to your data profile. This is a common missing step when a credentialing file appears complete but the payer still says it cannot retrieve the profile.
Practical rule: when a payer requests your CAQH ID, also confirm that payer is authorized in CAQH.
Step 6: Complete the Documents Tab and AAR Form
This is the step that is easy to miss. The CAQH guide says the message changes to "Next: Submit your documents for approval" after the initial attestation. The profile is not truly Initial Profile Complete until the required documents are received and approved.
In Documents, look for any Missing or required document slots. One of the important first-time documents may be the CAQH Authorization, Attestation, and Release form, often called the AAR form. Download the form from the matching Documents row, sign and date it, then upload it back into that row.
CAQH examples also include a malpractice insurance policy face sheet and DEA or controlled-substance documents when applicable. Some states can require extra release forms. The portal decides what is required from your provider type, practice state, and profile answers, so do not upload random forms that do not appear as required in Documents.
For therapists, the two most common document problems are an expired license upload and a malpractice face sheet that does not show the provider, coverage dates, limits, and carrier clearly enough.
Practical rule: the first-time CAQH setup is not done just because you clicked Attest. It is done when Profile Data is attested and the required Documents items, including the AAR form if shown, are uploaded and approved.
Step 7: Keep the Account Maintained
Creating CAQH once is not enough. DataSpring public resources describe ongoing attestations and directory confirmations. Update the profile when key facts change, and re-attest on time.
Log in after every license or malpractice renewal.
Update practice location and contact changes before payers discover them elsewhere.
Check that the right payers are authorized.
Respond to CAQH or DataSpring attestation reminders quickly.
Keep your CAQH Provider ID in your credentialing tracker.
The Fast Checklist
Create or recover your Provider Data Portal login.
Verify the email address and security questions are current.
Complete every Profile Data section.
Resolve required errors and review suggested fixes.
Authorize every payer or organization that needs access.
Review and attest the profile data.
Open Documents, sign and upload the CAQH AAR form if it appears, and upload every required missing document.
Monitor document status until required documents are approved and the profile is Initial Profile Complete.
Re-attest before the profile expires.
That is the workable version of CAQH setup: not just creating a login, but getting the profile into a state where payers can actually use it.
Sources
Planning a private practice?
Use Bomi's free Build resources to plan the business, provider identity, payer setup, and billing workflow before you see clients.
Use Build resources